
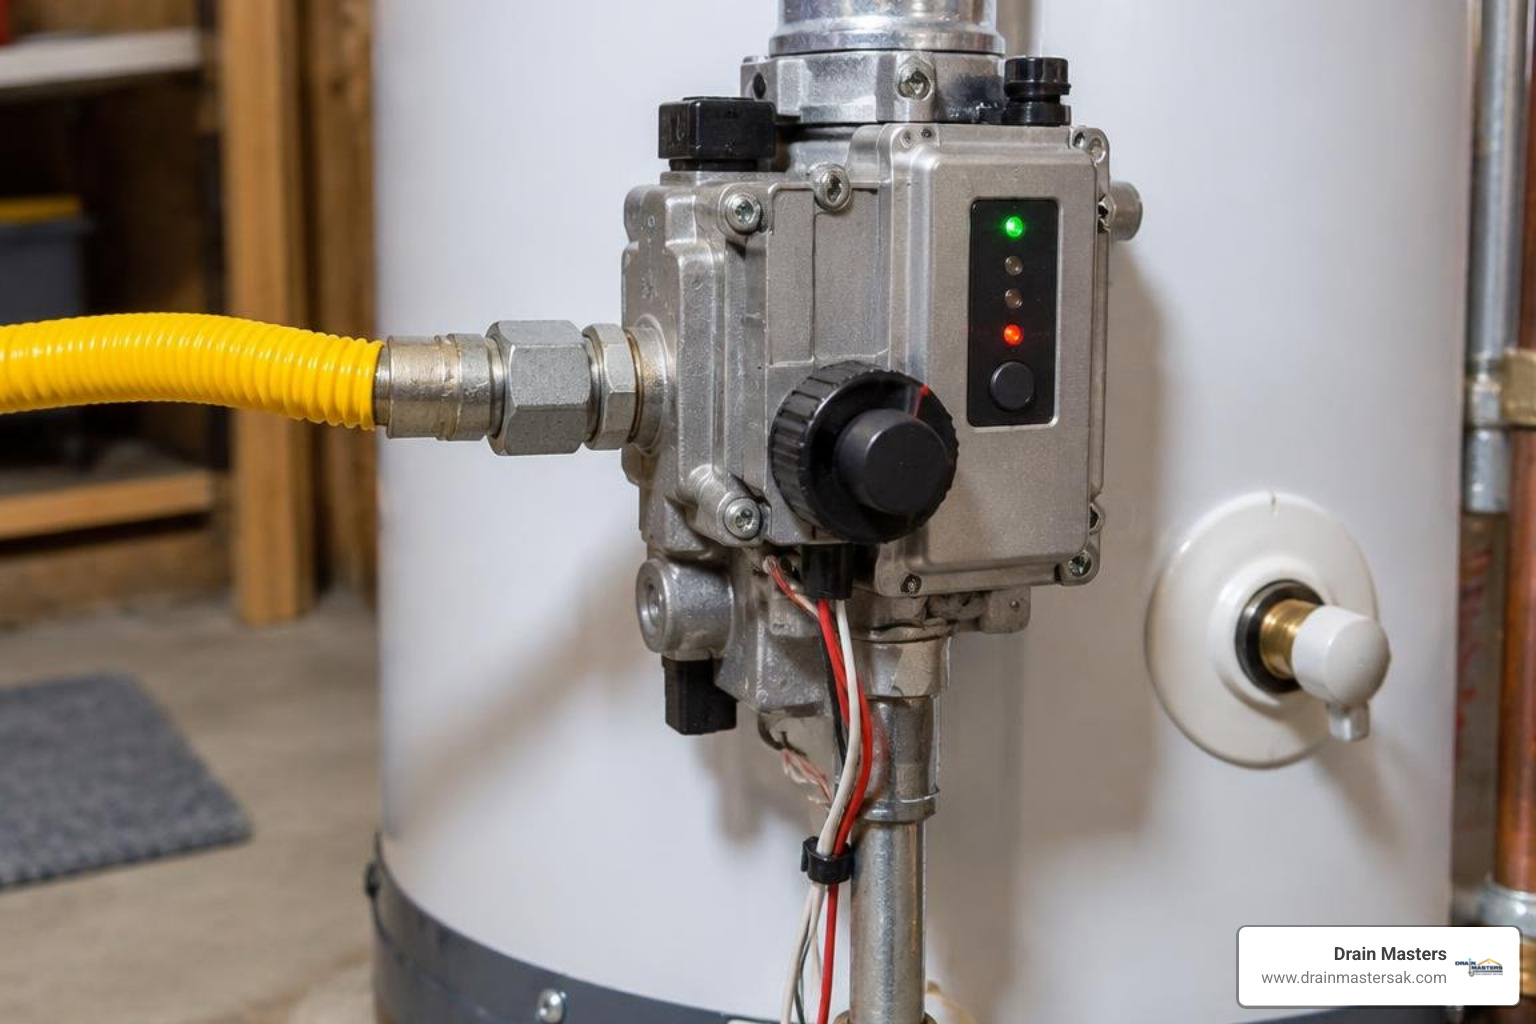
No Hot Water? Signs the Gas Valve May Be the Problem
When there is no hot water, the gas control valve is one component worth checking. It regulates fuel flow, manages the internal thermostat, monitors the safety pilot, and signals the main burner to fire. As this crucial component wears out, it can cause mild temperature swings, burner problems, or a complete loss of hot water.
Because the valve contains sensitive mechanical diaphragms, electrical solenoids, and temperature sensors, internal mechanical fatigue or electrical shorts will cause erratic operation. However, before assuming the valve has completely failed, it is essential to distinguish between a bad valve, a worn-out thermocouple, or a dirty pilot assembly.
| Symptom / Behavior | Likely Culprit: Gas Control Valve | Likely Culprit: Thermocouple / Thermopile | Likely Culprit: Dirty Pilot Orifice |
|---|---|---|---|
| Pilot Light Won’t Stay Lit | Possible internal solenoid failure | Very common; weak millivolt signal | Common; weak or misdirected pilot flame |
| Pilot Lights but Burner Never Ignites | High probability; stuck fuel valve or bad board | Unlikely if pilot stays lit steadily | Rare if pilot flame actively envelopes sensor |
| Water Is Lukewarm or Overheating | High probability; internal thermostat sensor failure | Extremely rare; thermocouple only handles safety flame | Impossible; orifice does not regulate water temp |
| Status Light Flashes Hardware Fault | High probability; electronic control failure | Rare; typically gives low-voltage error code | Rare; gives pilot outage code only |
| Pilot Flame Appears Yellow / Lazy | Unlikely; valve controls volume, not air mix | Unrelated to safety signal output | High probability; lint, dust, or soot buildup |
Inconsistent Water Temperature and Burner Failure
When a gas control valve’s internal thermostat sensor drifts out of calibration, it can no longer accurately read the water temperature inside the tank. You might step into the shower expecting a steady stream of hot water, only to be greeted by lukewarm water that quickly runs cold. In other situations, the valve may fail to shut off the gas supply at the set temperature, creating dangerously scalding water.
Burner misfires are another prime indicator of internal valve breakdown. If the internal gas solenoid jams due to sediment buildup or mechanical wear, it will prevent gas from reaching the main burner tube even when the pilot light is burning brightly. If your household is dealing with erratic heating cycles or sudden loss of hot water, scheduling a professional water heater repair ensures that the gas supply pressure, burner manifold, and thermostat sensors are evaluated safely.
Diagnostic Error Codes, Odors, and Flame Color Abnormalities
Modern water heaters feature intelligent gas control valves equipped with LED diagnostic indicator lights. Under normal operation, this status light will emit a steady, rhythmic green flash. When an internal component malfunctions, the microchip produces specific blink codes that indicate issues such as thermal cutoff switch trip, low thermopile voltage, or internal electronic board failure. Always consult your unit’s front-panel label to interpret these flash sequences correctly.
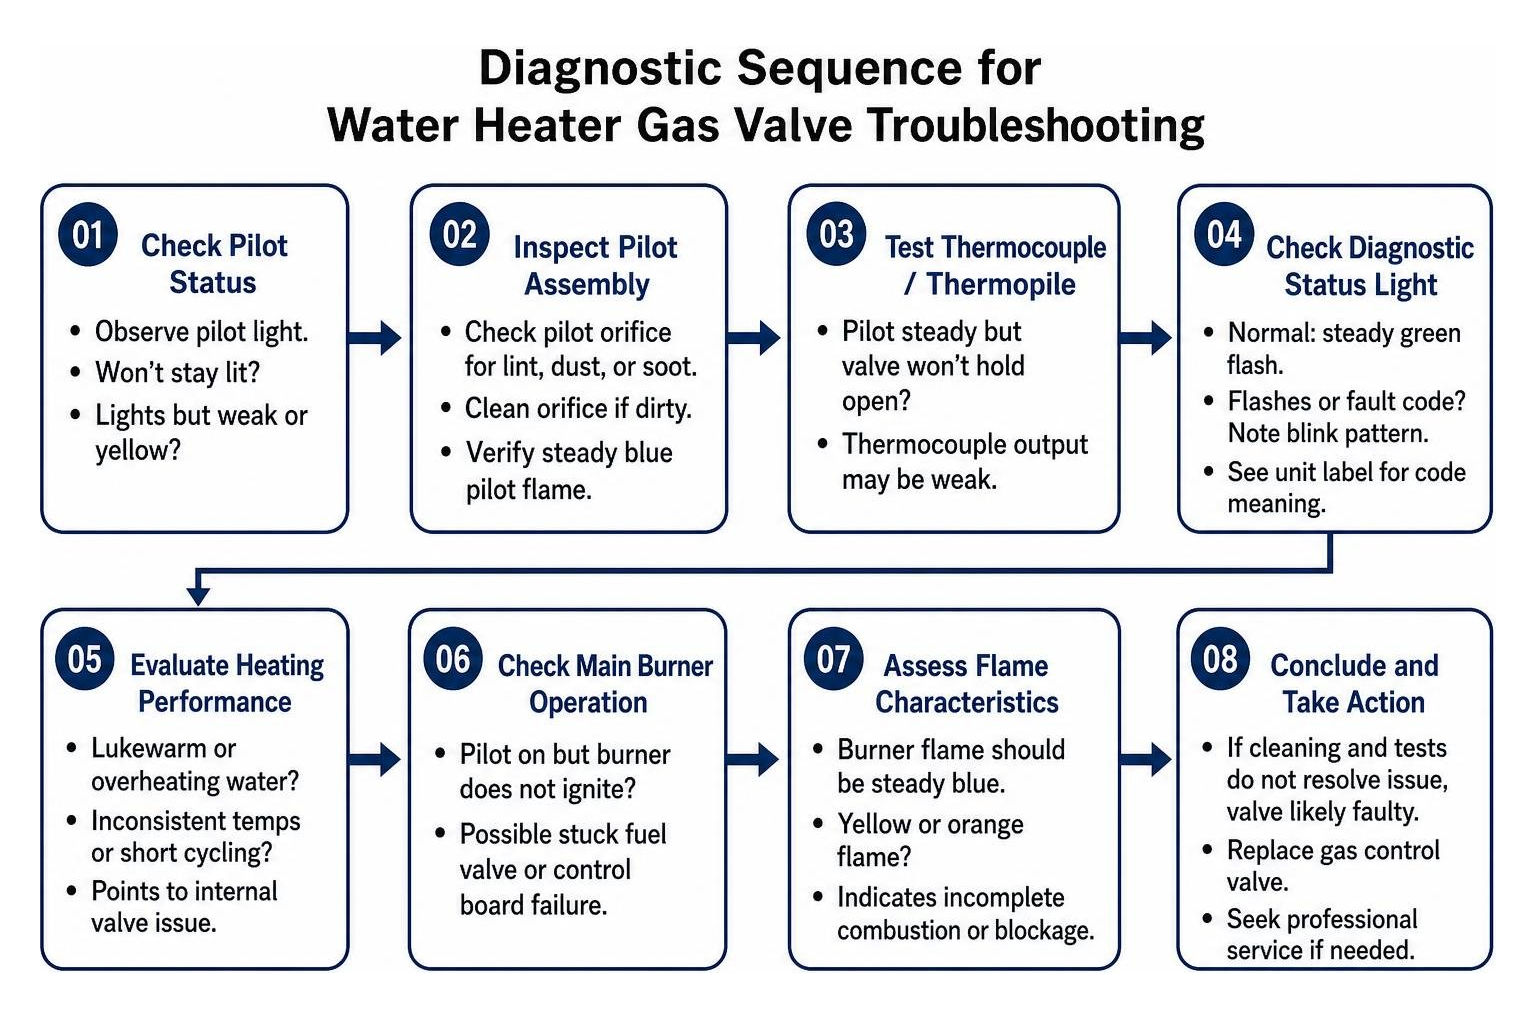
Beyond electronic codes, physical warning signs demand immediate attention:
- Combustion Flame Color: A healthy gas burner produces a crisp, steady blue flame. A flickering yellow or orange flame indicates incomplete combustion, which produces hazardous soot and dangerous carbon monoxide. According to the U.S. Environmental Protection Agency, carbon monoxide exposure can cause serious health effects and even death at high concentrations.
- Gas Odors: Natural gas and propane are treated with an odorant called mercaptan, which smells like rotten eggs or sulfur. Any persistent gas odor indicates an active leak.
If you ever detect strong odors of fuel or suspect carbon monoxide buildup near your heating appliances, leave your home immediately and contact a licensed emergency plumbing professional or your local utility company from a safe distance.
How to Tell Whether the Gas Valve Is Causing No Hot Water
Before treating the gas valve as the reason there is no hot water, rule out simpler causes. Technicians often find that an apparent valve failure is actually a degraded thermocouple, weak thermopile, or clogged pilot orifice. Proper diagnosis can prevent the unnecessary replacement of a fully functional valve.
Taking the time to rule out these individual components through careful troubleshooting protects your plumbing system and saves time.
Testing the Thermocouple, Thermopile, and Pilot Assembly
The thermocouple is a thermoelectric device that generates a small electrical voltage when heated by the pilot flame. This tiny electrical charge holds the internal safety magnet open, allowing gas to flow. If the thermocouple fails, the valve automatically cuts off gas flow to prevent unburned fuel from collecting in your home.
To test the assembly:
- Inspect the Pilot Flame: Ensure the pilot flame is steady, blue, and fully envelops the top 3/8-inch of the thermocouple tip. If the flame is yellow or small, clean the pilot tube and orifice with compressed air or a soft wire brush.
- Perform an Open-Circuit Voltage Test: Using a digital multimeter set to DC millivolts, attach one alligator clip to the copper lead and the other to the silver contact point at the end of the thermocouple. Light the pilot manually and hold the button down. A standard thermocouple should produce between 20 and 30 millivolts. An electronic thermopile (used on status-light models) should generate 350 to 750 millivolts under open circuit.
- Perform a Closed-Circuit Test: If the voltage drops below 10-12 millivolts under load, the sensor has degraded and cannot hold the valve’s safety magnet open. Replacing the inexpensive thermocouple or thermopile will solve the issue without touching the main gas valve.
Inspecting the Internal Thermostat and Control Circuitry
If the pilot light burns steadily and your multimeter confirms strong voltage output from the thermopile, the problem lies within the gas valve itself. Over years of heavy cycling, internal components face substantial thermal and electrical wear:
- Internal Solenoids: The electromagnet that lifts the main burner fuel gate can burn out, preventing ignition commands from opening the valve.
- Thermal Cutoff Switch (TCO): An internal thermal safety fuse designed to permanently disable the gas valve if combustion chamber temperatures exceed safe operating limits. Once blown, the entire valve body must be replaced.
- Electronic Control Board: Modern smart valves can suffer solder joint cracking or sensor communication failures due to ambient humidity, thermal expansion, and electrical surges.
When testing continuity across the valve’s internal terminals shows an open circuit despite proper electrical input, a complete replacement is the only safe and viable path forward.
Step-by-Step Guide to Hot Water Heater Gas Valve Replacement
Replacing a gas control valve requires working with both pressurized water and combustible gas lines. While a meticulous homeowner with mechanical aptitude can complete this repair, you must follow strict safety protocols and adhere closely to the manufacturer’s technical specifications. If at any point you feel uncertain, professional water heater services are the safest route.
Essential Tools and Preparation for Hot Water Heater Gas Valve Replacement
Before picking up a tool, verify that you have obtained the exact replacement valve designed for your specific water heater model. Gas control valves are not universal. You must match the fuel type (natural gas or LP/propane), tank connection thread size, temperature sensing probe length, and electrical ignition style. Check the rating plate on the side of your water heater for the complete model and serial number before ordering parts.
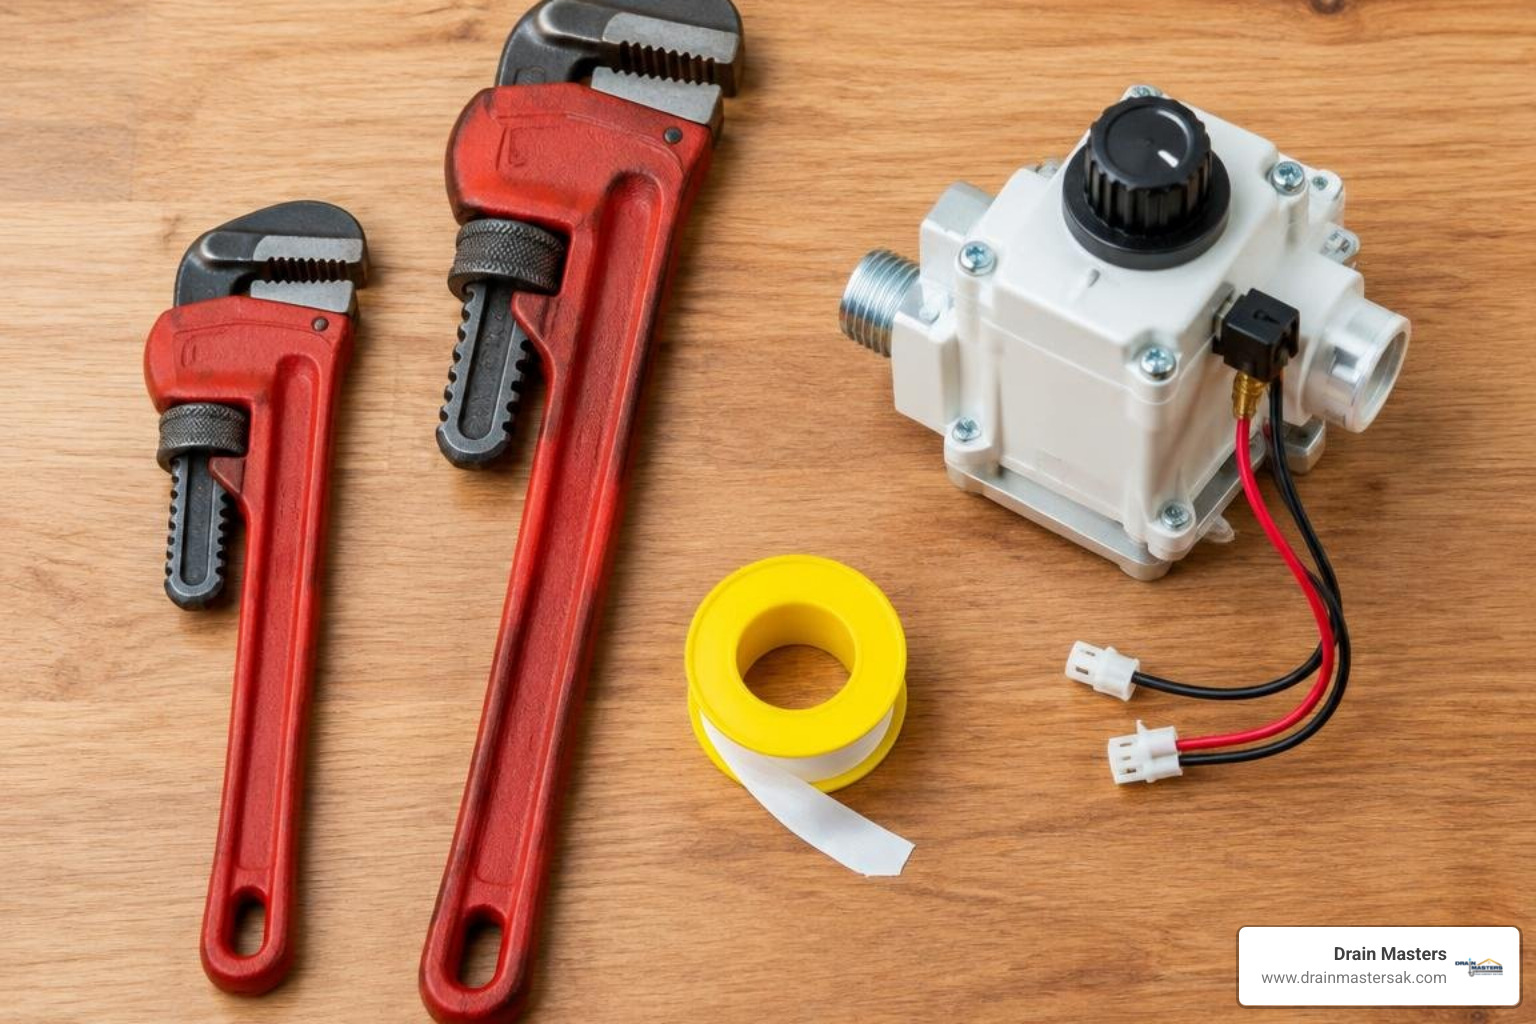
Gather the following tools and supplies:
- Two adjustable pipe wrenches (10-inch and 14-inch)
- Adjustable open-end wrenches
- Channel-lock pliers
- Flathead and Phillips screwdrivers
- Standard garden hose for tank draining
- Gas-rated PTFE thread seal tape (yellow tape marked for gas) or approved non-hardening pipe thread sealant (pipe dope)
- Non-corrosive gas leak detection bubble solution
Draining the Tank and Disconnecting Utility Lines
- Shut Off the Fuel and Power: Turn the gas control knob on the valve to the “OFF” position. Next, turn the manual shutoff valve on the rigid black iron gas supply pipe clockwise until the handle sits perpendicular (at a 90-degree angle) to the pipe. If your water heater is connected to an electrical outlet or uses a power-vent blower, unplug it or switch off the dedicated circuit breaker.
- Shut Off the Water Supply: Turn the cold water inlet valve on top of the water heater completely clockwise to stop incoming water.
- Depressurize and Drain the Tank: The gas control valve’s temperature sensing probe extends several inches directly into the water inside the tank. Therefore, you must drain the water level down below the valve port to prevent water from flooding your floor during removal. Connect a standard garden hose to the tank’s lower drain valve and route the opposite end to an exterior drain, floor drain, or sump basin. Open a hot water faucet at an upper-level sink to break the vacuum, then open the tank drain valve to empty the tank.
Removing the Old Unit and Installing the New Valve
- Disconnect External Gas Piping: Using two wrenches (one to hold the valve body steady and one to turn the fitting), disconnect the gas union and disassemble the black iron piping or flexible gas connector leading into the valve inlet.
- Disconnect Burner Components: Carefully unscrew the main burner supply tube, the pilot gas supply tube, the thermocouple/thermopile connector, and the electronic igniter wire from the base of the gas valve. Gently pull the burner tubes downward out of their insertion ports.
- Unthread the Old Valve: Place a pipe wrench firmly around the cast metal flats of the valve body. Never apply leverage to the plastic control knob or electronic housing. Turn the valve body counterclockwise to unthread it from the tank.
- Prepare the New Valve: Clean any residual pipe tape or debris from the tank’s female fitting. Inspect the threads for corrosion or damage. Wrap the male threads of the replacement valve with 3 to 4 wraps of yellow gas-rated PTFE tape in a clockwise direction, or apply a thin, even coat of approved pipe thread sealant, keeping the first two threads clean to prevent paste from entering the water tank.
- Thread the New Valve into Place: Carefully thread the new valve clockwise into the tank fitting by hand to avoid cross-threading. Once hand-tight, use your pipe wrench on the metal body flats to tighten the valve until it sits upright and properly aligned with the gas supply and burner connections.
Refilling the Tank and Restoring Operation
Never fire a water heater when the tank is empty or partially filled. Igniting the burner against an empty tank causes immediate dry-fire damage, melting internal components and ruining the tank’s glass lining.
- Close Drain and Refill: Disconnect the garden hose and close the lower tank drain valve. Turn the cold water supply valve on top of the heater fully open.
- Purge Air from Lines: Keep your upstairs hot water faucet open until water flows in a steady, unbroken stream without spitting air bubbles. Once water flows smoothly, turn off the sink faucet; the tank is now full and pressurized.
- Reattach Burner and Gas Lines: Reconnect the main burner feed tube, pilot tube, thermocouple, and igniter wire into the bottom of the new gas control valve, tightening the compression nuts hand-tight plus a quarter-turn. Reassemble the black iron gas supply line using pipe thread sealant on all male NPT joints.
If your water heater is aging or experiencing frequent leaks, understanding when a water heater replacement may be the better choice can help you compare repair needs with the long-term condition of the tank.
Safety Protocols, Leak Testing, and Emergency Procedures
Working with combustible gas requires meticulous attention to detail. Natural gas and propane operate under constant line pressure, and even a minuscule fitting leak can accumulate in enclosed mechanical rooms, posing severe fire, explosion, and asphyxiation hazards. Taking preventative steps aligns with standard residential efficiency and safety guidelines published by the U.S. Department of Energy. In Anchorage, AK, following local code requirements and using licensed professionals when needed helps protect your home and family.
Gas Leak Testing with Bubble Solutions and Electronic Detectors
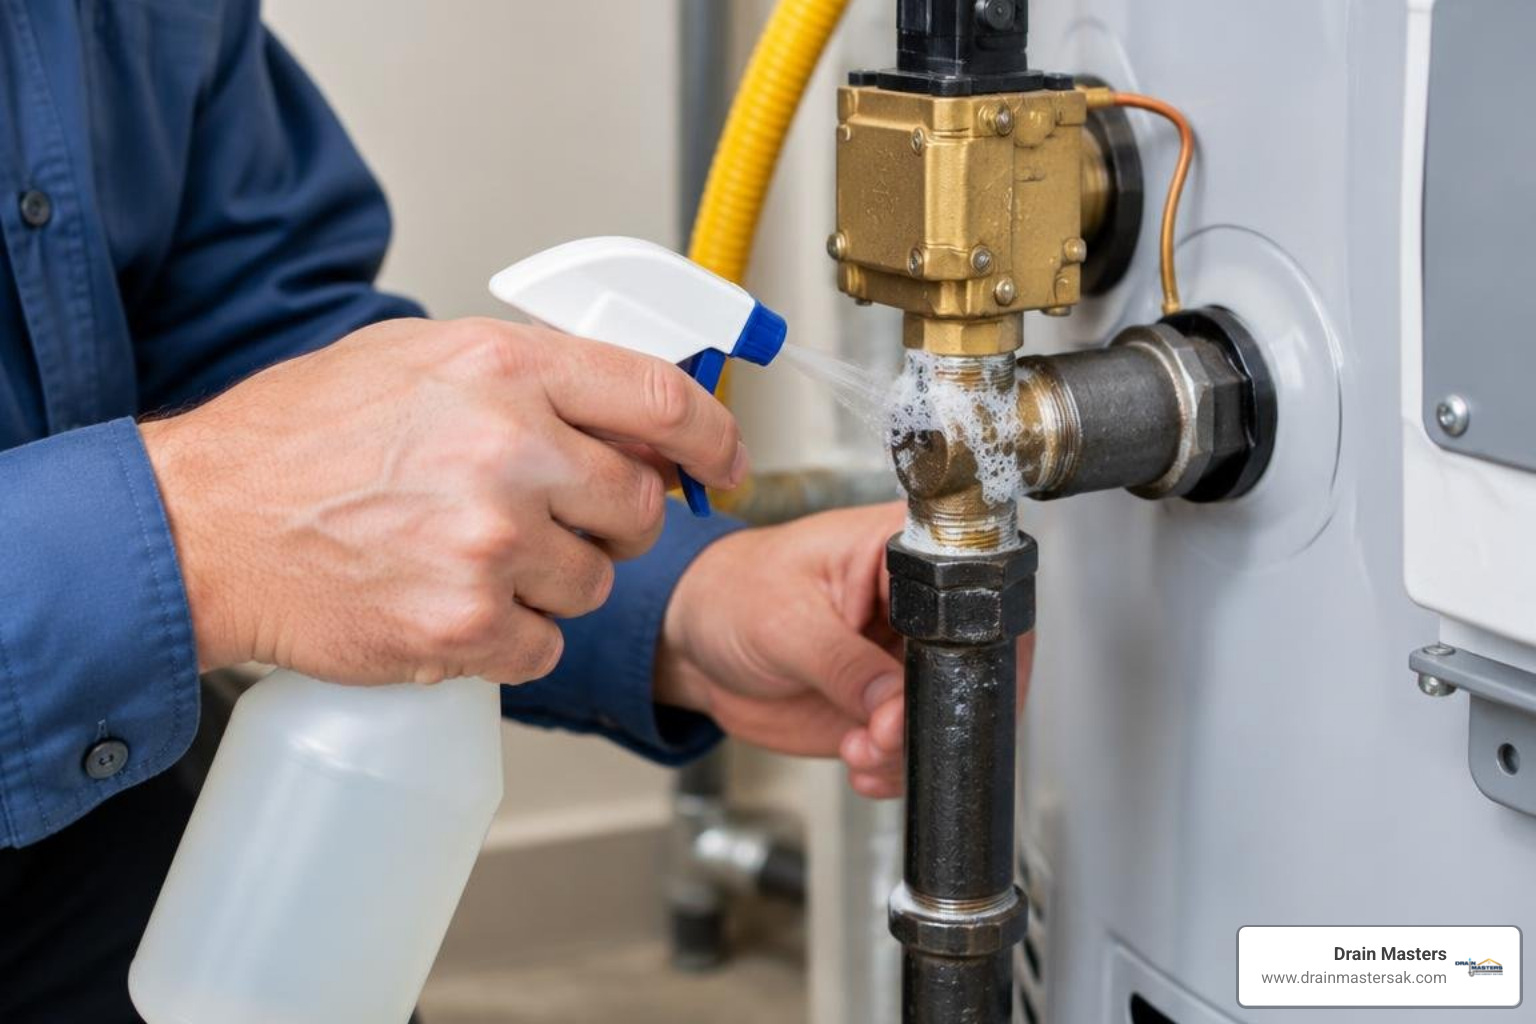
Never, under any circumstances, use an open flame, match, or lighter to check for gas leaks.
Perform a thorough leak test following this exact sequence:
- Slowly open the manual gas shutoff valve to pressurize the line up to the water heater.
- Generously spray or brush an approved, non-corrosive bubble leak detection solution (or a thick mixture of dish soap and warm water) over every single joint, thread, union, and compression fitting that was loosened or replaced.
- Watch the fittings closely for a minimum of two to three minutes:
- Passing Result: The liquid remains undisturbed or flows downward cleanly.
- Failing Result: Expanding bubbles or foam begin to grow around a joint, signaling an active gas leak.
- If bubbles form, immediately close the manual gas shutoff valve, loosen the leaking fitting, reapply thread sealant, retighten securely, and retest.
- For maximum safety, scan all joints with an electronic combustible gas detector sniffer.
Critical Safety Actions If You Smell Gas
If you detect a distinct rotten-egg or sulfur odor, or hear a hissing noise during or after the valve replacement:
- Stop immediately and do not attempt to light the pilot.
- Do not operate any light switches, appliances, flashlights, or landline phones, as a tiny electrical spark can ignite accumulated fuel.
- Evacuate all household members and pets from the building immediately.
- Shut off the main gas meter supply valve on the outside of your home if you can safely reach it.
- Once at a safe distance away from your property, contact your local gas utility provider or emergency services (911).
- Do not re-enter the home until licensed technicians have tested the air and declared the environment safe.
Cost Factors and DIY vs. Professional Hot Water Heater Gas Valve Replacement
When weighing whether to replace a gas valve yourself or hire a licensed technician, consider the total financial investment alongside technical complexity:
- Part Costs: A replacement gas control valve typically ranges from moderate to premium expense depending on the brand, electronic complexity, and fuel configuration.
- Warranty Coverage: Many residential water heaters carry a 6-to-12-year manufacturer warranty. If your unit is still within its warranty window, the manufacturer may supply the replacement gas valve at no cost for the part itself.
- Professional Installation and Longevity: A professional installation covers mechanical labor, proper pipe sizing, system depressurization, precision leak testing, and post-installation combustion analysis. A typical gas control valve lasts between 10 and 15 years, often matching the entire service life of the water heater tank itself.
If your water heater is over 10 to 12 years old and requires an expensive valve replacement, putting that money toward a brand-new water heating system may be more cost-effective than repairing an aging, sediment-laden tank. For homes considering a different setup, this overview of whether a tankless water heater is worth it in Anchorage explains the factors that can affect that decision.
Frequently Asked Questions
How do I know if my water heater gas valve is bad?
A failing gas valve typically causes a complete lack of hot water, frequent pilot light outages, or inconsistent water temperatures. On modern units equipped with an electronic control, the status light will flash diagnostic error codes indicating an internal circuit board fault, thermal cutoff trip, or sensor failure.
How much does it cost to replace a gas valve on a water heater?
The total investment depends on the water heater’s brand, whether the valve is a standard mechanical unit or an advanced electronic model, and whether the tank is still protected by a manufacturer parts warranty. Older units past their warranty period involve higher out-of-pocket costs for replacement components.
Can I replace a water heater gas valve myself?
A homeowner with mechanical experience, proper plumbing tools, and a strict commitment to safety procedures can replace a gas valve. However, because the task involves high-pressure water draining, precision pipe fitting, and combustible fuel lines, hiring a licensed plumber ensures full safety and local building code compliance.
Do I need to drain the water heater before replacing the gas valve?
Yes, you must lower the water level inside the tank. The temperature-sensing probe of the gas valve penetrates directly into the water storage reservoir. If you remove the valve without draining the water down below the valve port, water will pour out of the opening.
How long does a water heater gas valve typically last?
A water heater gas control valve usually lasts between 10 and 15 years under normal operating conditions. Regular tank maintenance, annual flushing to remove sediment, and protecting the valve from high ambient humidity will help it reach its maximum operating lifespan.
How do I confirm the issue is the gas valve and not the thermocouple?
Use a digital multimeter to measure the direct-current millivolt output of the thermocouple while holding the pilot button down. A healthy thermocouple produces 20 to 30 millivolts, while an electronic thermopile generates 350 to 750 millivolts. If the voltage tests within normal ranges but the valve still refuses to open the main burner, the internal valve mechanism is faulty.
How do I safely test for gas leaks after installation?
Apply a non-corrosive soapy water bubble solution or a commercial leak detection fluid to every threaded joint and compression fitting after restoring gas pressure. If bubbles appear or grow, an active leak is present. You can also verify the seal using a calibrated electronic gas detector. Never use an open flame to check for leaks.
What should I do if I smell gas during or after replacement?
If you smell rotten eggs or hear a hissing noise, stop what you are doing and do not operate any electrical switches. Immediately evacuate everyone from the home, shut off the gas supply at the main meter if safe to do so, and call your local gas utility provider or emergency services from outside the home.
Are gas control valves interchangeable between different water heaters?
No, gas control valves are not interchangeable. They are engineered to match specific water heater tank configurations, fuel sources (natural gas versus LP/propane), thread port dimensions, sensing probe lengths, and electronic control protocols. Always order replacements using your water heater’s exact model and serial number.
Why must the water heater tank be full before relighting the burner?
Lighting the burner on an empty or partially filled tank causes dry-fire conditions. The intense heat of the gas burner without surrounding water to absorb the thermal energy can permanently warp the metal tank, melt the dip tube, shatter the protective glass lining, and ruin the new gas valve.
Conclusion
A malfunctioning gas control valve can quickly disrupt your home’s comfort, but identifying the signs early, such as fluctuating temperatures, persistent pilot outages, or diagnostic error codes, allows you to take corrective action before a total breakdown occurs. By testing the thermocouple, verifying electrical continuity, and following meticulous safety steps during removal and installation, you can restore your hot water system safely and effectively.
Working with combustible gas lines and pressurized plumbing systems always demands extreme caution, precision, and adherence to manufacturer guidelines. If you are uncomfortable handling gas fittings or suspect a persistent leak, the Drain Masters team can help. With more than 20 years of local service and advanced diagnostic tools, the team provides dependable support for Anchorage, AK homeowners. To schedule help, contact our professional water heater repair technicians and help keep your hot water system operating safely and reliably.