
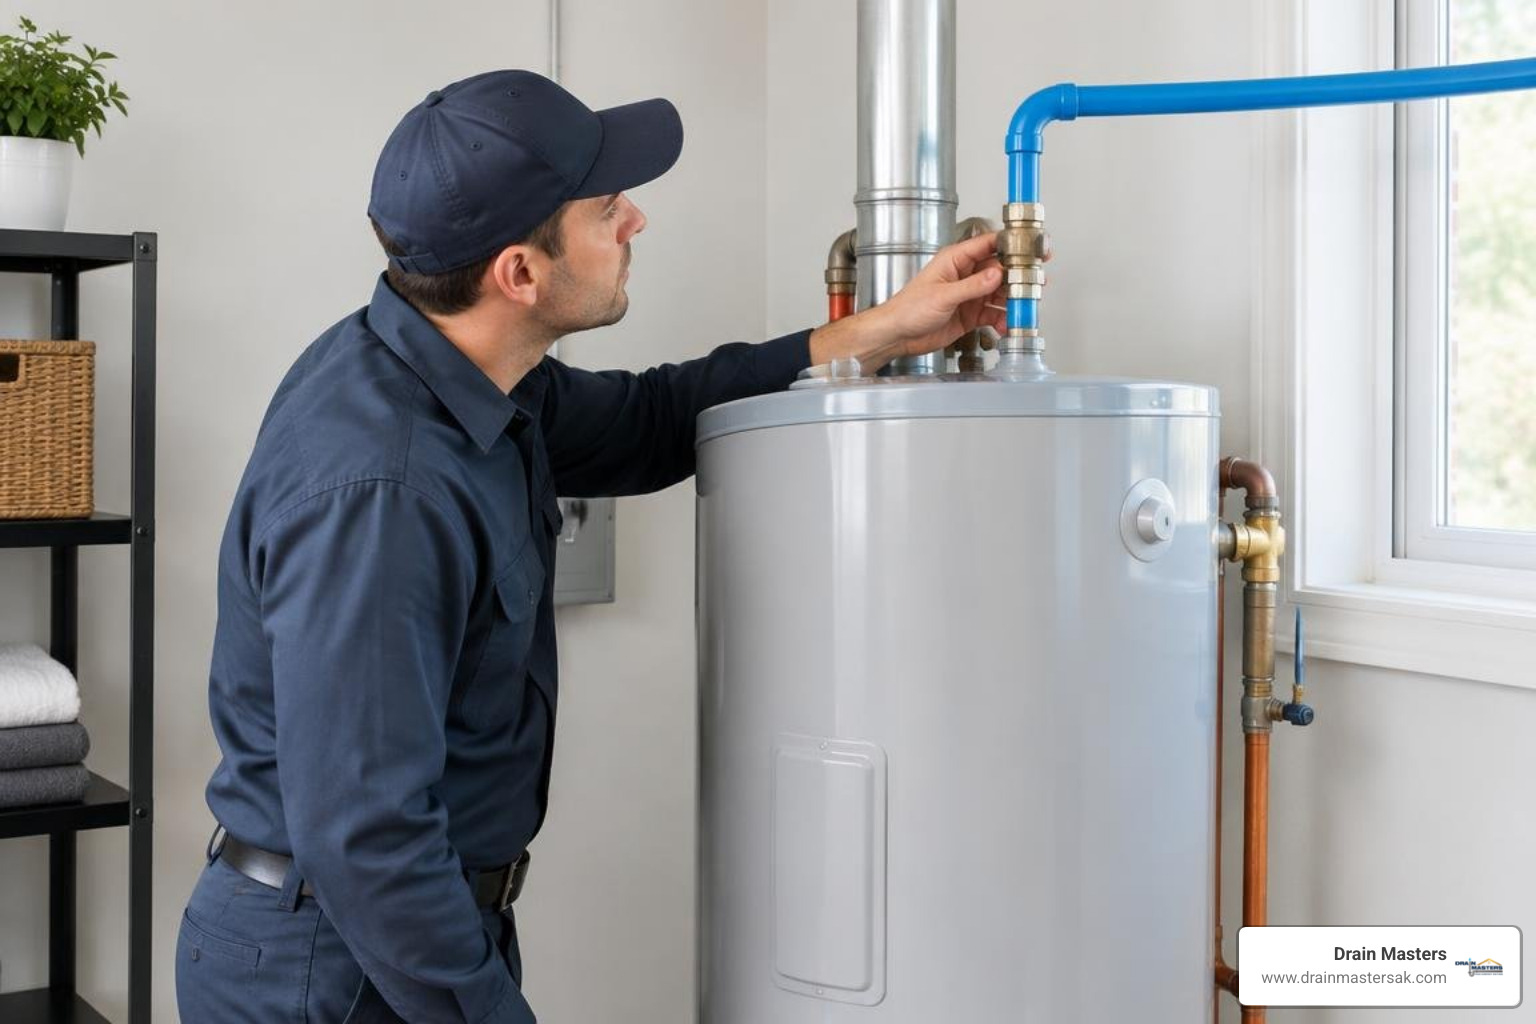
A Small Part With a Big Job: What to Know About Water Heater Dip Tube Replacement
Water heater dip tube replacement is one of the most overlooked fixes that can instantly restore your hot water supply. If your water is turning lukewarm too fast, here’s what you need to know right away:
How to replace a water heater dip tube (quick overview):
- Shut off power or gas to the water heater
- Turn off the cold water supply valve
- Partially drain the tank
- Unscrew the cold water inlet nipple at the top of the tank
- Pull out the old dip tube and slide in the new one
- Seal the threads with Teflon tape and reassemble
- Flush the tank, then restore power or gas
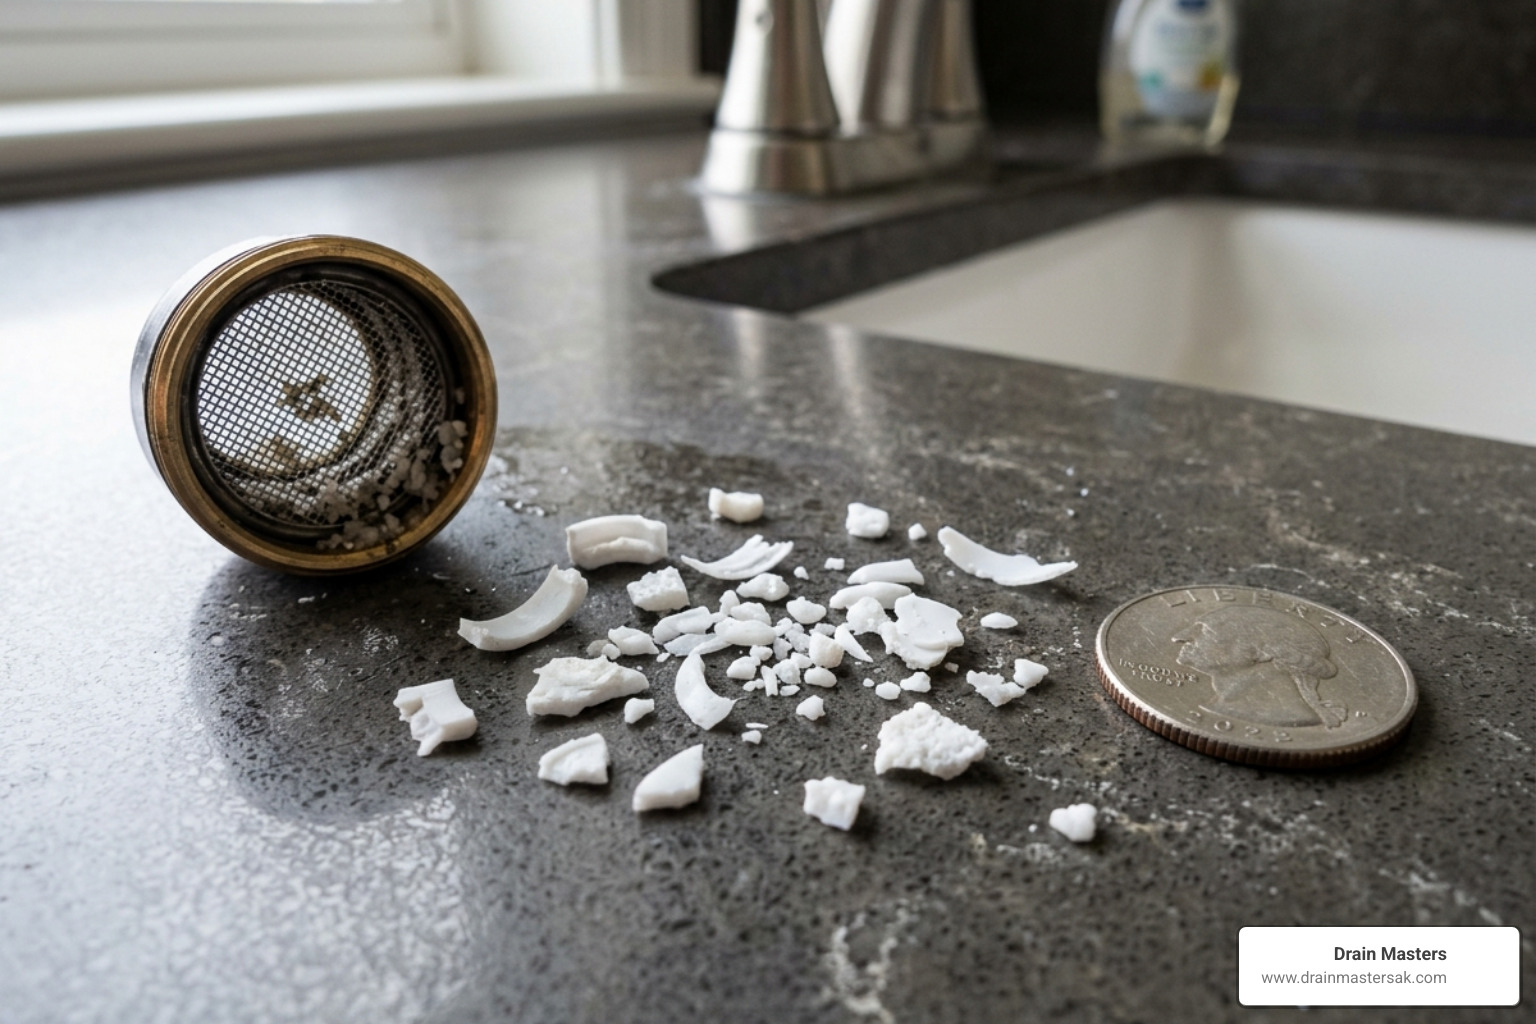
The dip tube is a simple pipe inside your water heater, but when it breaks, everything suffers. Your showers get short. Your energy bills creep up. And if you look closely at your faucet aerators, you might even spot tiny white plastic flecks floating in the water.
The good news? A replacement dip tube costs as little as $10 to $50, and the fix is straightforward when you know what you’re doing.
The Drain Masters team brings more than two decades of hands-on plumbing experience in Anchorage, AK. Our technicians have seen water heater dip tube replacement solve hot-water problems that homeowners had been dealing with for months. This guide explains the steps, safety considerations, and signs that professional help is the better choice.

Understanding the Role of Your Water Heater Dip Tube
To understand why a water heater dip tube replacement is so critical, we first have to look at how a standard tank-style water heater operates. Most people assume the tank is just a big pot of boiling water, but it’s actually a highly organized system of “thermal stratification.”
In a healthy tank, hot water stays at the top (near the outlet) because it is less dense, while cold water sits at the bottom. The dip tube is the gatekeeper of this system. It is a long, narrow pipe attached to the cold water inlet. Its sole job is to direct incoming cold water straight to the bottom of the tank, near the heating element (in electric models) or the burner (in gas models).
When the dip tube is working, the cold water enters at the bottom, gets heated, and slowly rises to the top. When the dip tube breaks or disintegrates, that cold water dumps right into the top of the tank. It immediately mixes with the hot water you were about to use for your shower. The result? Lukewarm water that turns cold in minutes.
Routine plumbing maintenance can help identify sediment, corrosion, and inlet-connection issues before they reduce a tank water heater’s performance.
Common Causes of Dip Tube Failure
Why do these tubes fail in the first place? In our experience serving the Anchorage community, there are a few usual suspects:
- The Age Factor: Most dip tubes are made of plastic (polypropylene or PEX). Over time, constant exposure to high temperatures makes the plastic brittle. While they are generally designed to last 10 to 15 years, many start failing around the 10-year mark.
- The 1990s Manufacturing Defect: If you have an older unit, you might be a victim of a massive industry-wide issue. Between 1993 and 1996, a specific type of polypropylene was used in nearly 90% of all water heaters produced. This material was found to disintegrate prematurely due to water acidity and high temperature settings. It’s estimated that over 20 million units were affected.
- Hard Water and Mineral Buildup: While Anchorage water is relatively soft compared to other parts of the country, mineral buildup can still occur. Calcium and magnesium can settle around the tube, causing it to overheat or crack.
- Temperature Settings: If your thermostat is cranked up too high (above 140°F), the plastic tube will degrade much faster than it would at a standard setting.
Preventing Future Dip Tube Issues
We always tell our customers that a little prevention goes a long way. To avoid needing a premature water heater dip tube replacement, follow these simple maintenance tips:
- Annual Flushing: Drain and flush your tank at least once a year. This removes the sediment that can crowd the bottom of the tank and cause the dip tube to overheat.
- Set to 120°F: Keeping your water heater at 120 degrees Fahrenheit is the “sweet spot.” it’s hot enough to kill bacteria but cool enough to preserve the life of your internal plastic components.
- Use Corrosion-Resistant Materials: When you do replace the tube, opt for Cross-linked Polyethylene (PEX). It is much more resistant to the “crumbing” effect seen in older polypropylene models.
- Regular Inspections: During your annual plumbing check-up, have a professional check the cold water inlet. If we see signs of brittle plastic early, we can swap it out before it clogs your plumbing fixtures.
Signs You Need a Water Heater Dip Tube Replacement
How do you know if the dip tube is the culprit? It’s often mistaken for a broken heating element or a faulty thermostat, but there are specific “tells” that point directly to the dip tube.
The most common symptom is “short-lived” hot water. You might start your shower with plenty of heat, but within three to five minutes, it becomes lukewarm. This happens because the cold water is entering the top of the tank and diluting the hot water supply before it can leave the tank.
Another sign is a sudden drop in water pressure or inconsistent temperatures. If the tube has snapped off, the water flow pattern inside the tank is disrupted, leading to unpredictable performance. You might also notice your energy bills creeping up. Because the cold water isn’t being directed to the heating source efficiently, your burner or element has to stay on longer to compensate for the constant mixing.
A dip tube is only one possible cause of declining hot-water performance. A failing heating element, thermostat issue, sediment buildup, or an aging tank can produce similar symptoms. Homeowners weighing a larger repair can also consider when water heater replacement makes sense for an aging unit.
Diagnosing the Need for water heater dip tube replacement
If you suspect a problem, there are three main ways to diagnose it:
1. The “White Fleck” Test This is the “smoking gun” of dip tube failure. When the tube disintegrates, it breaks into tiny white or gray plastic chips. These chips travel through your hot water lines and get stuck in:
- Faucet aerators
- Showerheads
- Washing machine intake screens If you unscrew your faucet aerator and find what looks like plastic “snow,” you almost certainly need a water heater dip tube replacement.
2. The Serial Number Check As we mentioned, units built between 1993 and 1997 are high-risk. Check the rating plate on the side of your tank. Look at the first four digits of the serial number. Usually, the third and fourth digits represent the year. If you see “94,” “95,” or “96,” and you’re experiencing lukewarm water, the dip tube has likely crumbled.
3. The Quick-Test Method Connect a garden hose to the drain valve at the bottom of the tank. Turn on the cold water supply. If the water coming out of the hose turns cold immediately while the top of the tank is still hot, the dip tube is doing its job. If it stays warm for a long time while the house gets lukewarm water, the tube is likely broken near the top.
Risks of Ignoring a Broken Dip Tube
It might be tempting to just deal with shorter showers, but ignoring a broken dip tube can lead to bigger headaches.
First, those plastic fragments don’t just stay in the tank. They can clog your expensive mixing valves, ruin your dishwasher, and reduce the flow in your showerheads to a trickle. Plastic debris can also collect where other material already restricts flow. Understanding common causes of clogged drains can help homeowners spot related fixture problems before they become more disruptive. Cleaning out an entire home’s worth of plumbing lines is much more expensive than a simple water heater dip tube replacement.
Second, a broken tube can actually damage the tank itself. In some cases, a broken piece of the tube can bounce around inside the tank, chipping the enamel “glass-liner” that protects the steel from rusting. Once that liner is compromised, the tank will eventually leak, requiring a full replacement of the entire unit.
Choosing the Right Materials for Your Replacement
When it’s time for a water heater dip tube replacement, you have choices. Not all dip tubes are created equal, and choosing the right material can mean the difference between a 5-year fix and a 15-year fix.
PEX vs. Plastic vs. Metal
| Material | Pros | Cons |
|---|---|---|
| Standard Plastic (Polypropylene) | Cheap, widely available, easy to cut. | Can become brittle over time; susceptible to high-heat failure. |
| PEX (Cross-linked Polyethylene) | Highly flexible, extremely durable, resists mineral buildup, won’t crumble. | Slightly more expensive; may require specific fittings. |
| Metal (Copper/Stainless) | Virtually indestructible. | High risk of galvanic corrosion if not installed with dielectric nipples; expensive. |
We almost always recommend PEX dip tubes. They are the modern standard for a reason. They don’t react with the water chemistry in Anchorage and can withstand the thermal stress of a water heater much better than old-school plastics.
Flexible Options for Low-Clearance Installations
A challenge we face in Anchorage homes is “low clearance.” If your water heater is tucked into a crawlspace or a closet with a low ceiling, you might not have the 50 inches of overhead space required to slide a rigid dip tube into the tank.
This is where flexible or telescoping dip tubes come in. PEX tubes are naturally semi-flexible, meaning you can curve them slightly to get them into the hole. There are also specialized “link” dip tubes that work like a chain, allowing you to install them one segment at a time in very tight spaces.
Recommended Brands and Warranty Claims
When shopping for parts, we recommend sticking with OEM (Original Equipment Manufacturer) parts or high-quality aftermarket brands.
- Rheem Protech: These are excellent, reliable tubes often featuring integrated anti-siphon holes. Select a replacement that matches the tank manufacturer’s specifications and the required 3/4-inch NPT connection.
- Camco: Known for their 50.5-inch tubes, Camco products (like the 11163) consistently receive high ratings (4.6/5 stars) from DIYers for their ease of installation.
- Reliance: A solid budget-friendly option, though their ratings are often slightly lower than Rheem or Camco.
If your water heater is less than 6 to 10 years old, check your warranty! Many manufacturers like Rheem offer a 1-year warranty on parts and longer on the tank. You might be able to get the replacement part for free by providing your serial number to the manufacturer. For more complex issues, our plumbing repair team can help assess warranty coverage and the condition of the unit.
Step-by-Step Guide to water heater dip tube replacement
Ready to get to work? Replacing a dip tube is a great Saturday morning project. Just remember: you are working with pressurized hot water and electricity (or gas), so safety is paramount.
Tools Required for water heater dip tube replacement
Before you start, gather these items:
- Pipe Wrench: To loosen the water connections.
- Teflon Tape or Pipe Joint Compound: To ensure a leak-free seal.
- Garden Hose: To drain the tank.
- Screwdriver: To help pry out the old tube if it’s stuck.
- Bucket: To catch any drips.
- New Dip Tube: Ensure it matches your tank’s diameter (usually 3/4 inch).
The Replacement Process
1. Shut it Down Turn off the power at the circuit breaker (for electric) or turn the gas valve to “Pilot” or “Off.” Shut off the cold water supply valve leading into the tank.
2. Depressurize and Drain Open a hot water faucet somewhere in the house to let air in. Attach your garden hose to the drain valve at the bottom of the heater and run it to a floor drain or outside. You only need to drain about 2–5 gallons, just enough to get the water level below the top of the tank.
3. Disconnect the Cold Water Line Use your pipe wrench to unscrew the cold water supply line from the top of the tank. Once the pipe is out of the way, you’ll see the “nipple” (the threaded fitting) where the dip tube lives.
4. Extract the Old Tube Unscrew the nipple. The dip tube is usually attached to this nipple or sitting just inside the hole. If it’s broken, you might need to use a screwdriver or a pair of needle-nose pliers to fish it out. If it has completely fallen into the tank, don’t panic (see the FAQ below).
5. Install the New Tube Slide your new water heater dip tube replacement into the hole. If it’s a “combo” style, it will have the nipple built-in. Apply 5-6 wraps of Teflon tape to the threads. Screw it back into the tank and tighten it with your wrench.
6. Reconnect and Refill Reconnect the cold water supply line. Crucial Step: Turn the cold water supply back on and let the tank fill completely until water flows steadily from the hot water faucet you opened earlier. This “purges” the air. Never turn the power back on until the tank is full, or you will burn out your heating elements instantly!
7. Final Check Check for leaks around the threads. Once you’re sure it’s dry, restore the power or gas.
Repair vs. Replace: Costs and Professional Considerations
Is it worth doing a water heater dip tube replacement yourself?
DIY Costs: If you do it yourself, you’re looking at $10 to $30 for the part and maybe $10 for some Teflon tape and a wrench if you don’t own one. It’s an incredibly cost-effective repair.
Professional Costs: A professional plumber in Anchorage will typically charge for a service call plus labor. While this is more expensive than DIY, it ensures the job is done to code, the tank is properly flushed, and there are no hidden leaks. If your water heater is in a difficult location or if the fittings are heavily corroded, calling a pro is the safest bet. For difficult locations, corroded fittings, or uncertainty about the diagnosis, professional water heater repair can provide a safer assessment and repair.
When to Upgrade to a Heat Pump Water Heater (HPWH)
If your water heater is over 10 years old and the dip tube has failed, you might want to consider if a repair is throwing “good money after bad.”
For qualifying electric or natural-gas heat pump water heaters placed in service on or before December 31, 2025, the former federal Energy Efficient Home Improvement Credit equaled 30% of eligible costs, up to $2,000. That credit is not available for equipment placed in service after December 31, 2025. Local utility rebates or other incentives may still be available, so homeowners should confirm current programs before choosing a replacement.
If recurring tank issues make a replacement more practical, tankless water heaters may be worth discussing with a qualified professional.
Frequently Asked Questions about water heater dip tube replacement
Can I leave broken dip tube pieces in the tank?
Yes. In most cases, the plastic fragments are non-toxic and will simply settle at the bottom of the tank. They are too large to pass through the drain valve during a standard flush, and they won’t harm the heating process. The only real risk is if they get stirred up and clog the outlet, but this is rare. If you’re worried, a professional can perform a “deep flush” to try and remove them.
Do they make metal dip tubes for better durability?
While you can find copper or stainless steel dip tubes, they aren’t common in residential settings. The reason is “galvanic corrosion.” When two different metals touch in water, the weaker one corrodes. Unless you use specialized dielectric nipples, a metal tube can actually cause your tank to rust out faster. PEX is the preferred modern material for durability without the corrosion risk.
How do I know if my water heater is under warranty for a dip tube?
Find your serial number and visit the manufacturer’s website (Rheem, A.O. Smith, Bradford White, etc.). Most have a “Warranty Verification” tool. Standard warranties are 6 years, but many “pro” models have 10-year or even lifetime tank warranties. If you are the original owner, the dip tube is often covered under the “parts” section of your warranty.
Conclusion
A water heater dip tube replacement might seem like a small task, but it’s the key to restoring the comfort of your home. Whether you’re dealing with the “white flecks” of a disintegrating 90s-era tube or just a worn-out PEX pipe, addressing it now will save you money on energy bills and protect your plumbing system from clogs.
At Drain Masters, we’ve been Anchorage’s trusted plumbing experts for over 20 years. As a family-owned business, we take pride in dependable workmanship and getting the job done right the first time, whether that’s a simple dip tube swap or a full system upgrade.
If you’re not comfortable handling the wrenches yourself, or if you want a professional to ensure your entire system is running at peak efficiency, we’re here to help. We perform over 4,000 jobs a year, and we’d love to make yours the next success story.
For help diagnosing hot-water problems or replacing a failed dip tube, contact our professional water heater repair technicians.